初めに
2024年6月末ごろに、Ansible Lightspeedの機能が拡張され、複数のタスクをまとめた1個のPlaybookを作成する機能が追加されました。(以前は、タスクの生成機能に限定)
試してみたので、手順をご紹介いたします。
前提
VS CodeにAnsible Pluginを導入し、ライセンスの認証が出来ていること
手順
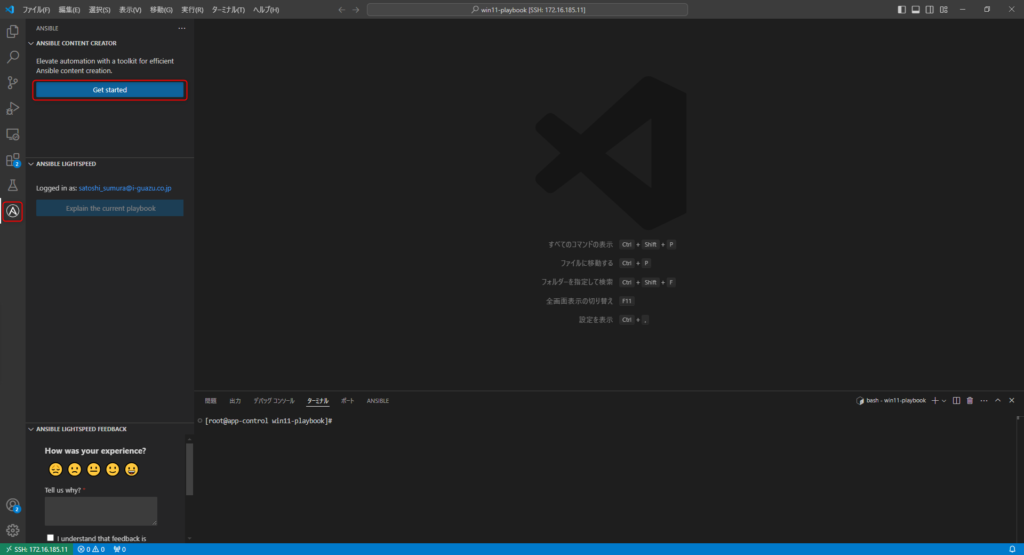
1. VS Codeで、Ansible Pluginのアイコンを選択し、「ANSIBLE CONTENT CREATOR」の「Get started」をクリック
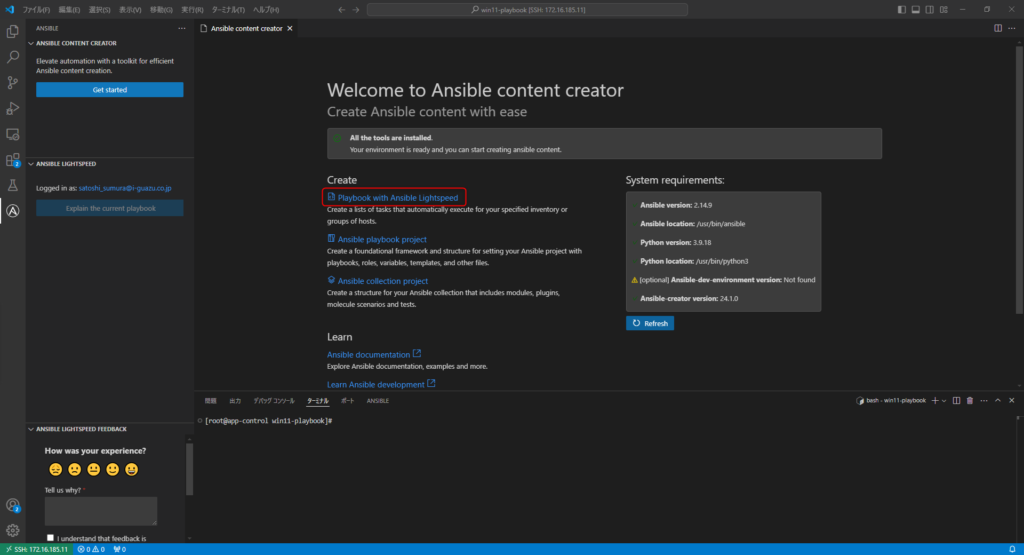
2. Ansible Content Creatorの画面が出るので、「Playbook with Ansible Lightspeed」をクリック
3. 「What do you want the playbook to accoplish?」というテキストボックスに、生成したい処理の内容を記入して、「Analyze」をクリックします。
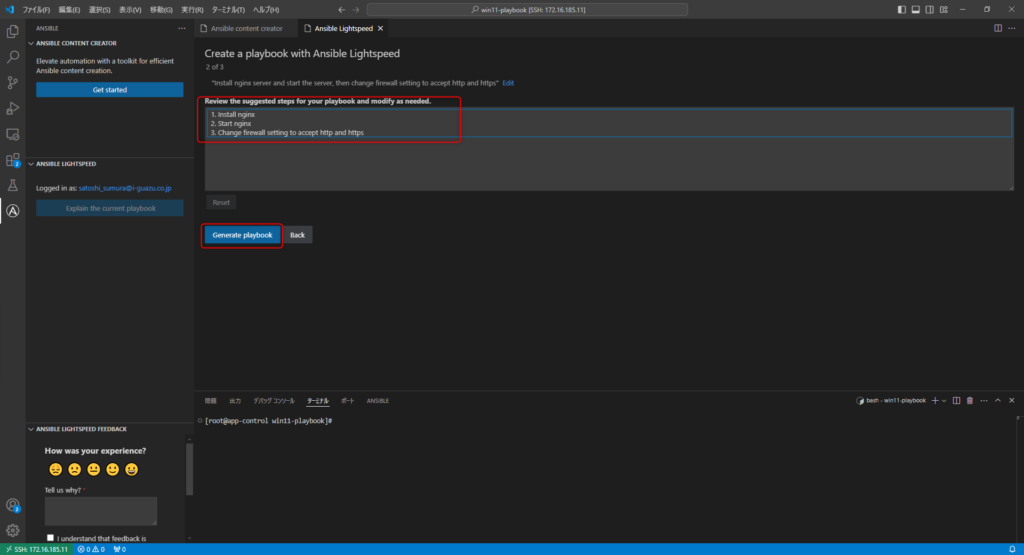
ここでは、「Install nginx server and start the server, then change firewall settings to accept http and https」と入力してみました。
4. 画面が切り替わり、先ほど入力に応じて、設定するためのステップが自動生成されて、「Review the suggested steps for your playbook and modify as needed」というテキストボックスに、表示されます。必要に応じて、変更し、「Genarate playbook」をクリックします。
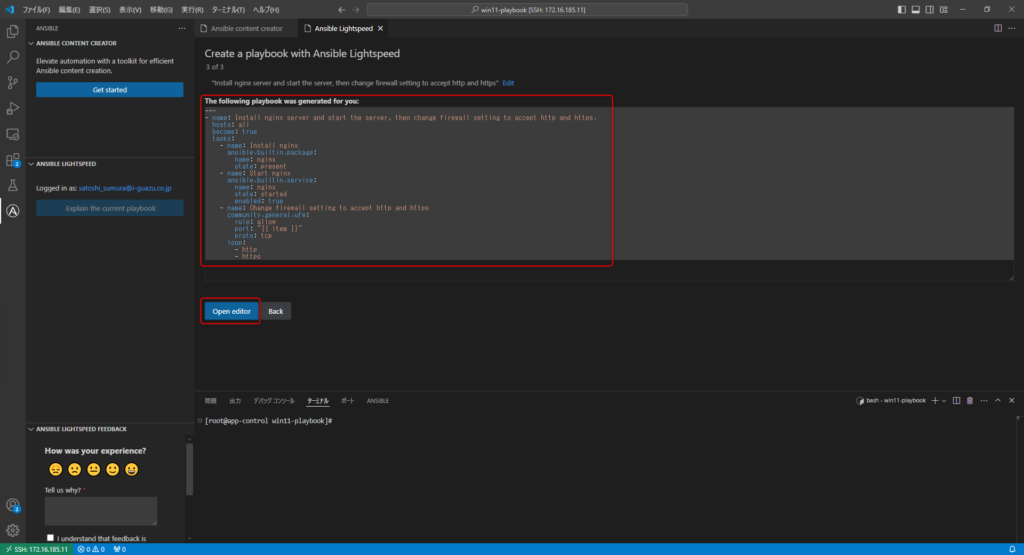
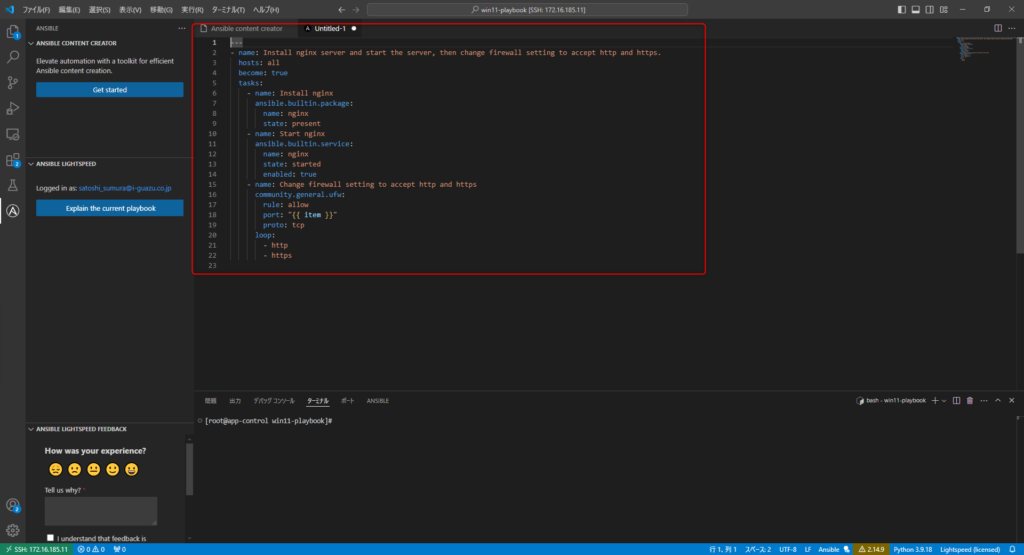
5. 画面が切り替わり、Playbookのyamlが生成され、表示されます。「Open Editor」をクリックします。
6. Editor画面に生成されたコードが表示されます。
所感
マニュアルを参照しなくても、簡単に使うことができました。プロンプトに長い文章を入れることもできるので、プロンプトを工夫することにより、1個のタスクでも、この機能を使用した方が、精度を高くすることが可能かもしれません。
